V5 Chapter 43
Details
243 - Distracted by the ICOM Receiver 2011-12-24
I was going along just fine with the database development until I came to the point where I wanted to actually try it on some data from the receiver. At that point I noticed that the receiver display was not working so I had to stop and fix it. The display on the ICOM IC-R7000 has a problem with capacitors. It uses quite a few and they tend to 'dry out' over the years. The electrolyte in the Tantalums stops working when this happens and on l the R7000 the symptom is that the display goes out after a warm up period.
This is the steps to find and replace those caps.
-
Tare your receiver completely apart - well almost. You need to get to the Display board that is right behind the display itself.
-
Remove the top and bottom covers.
-
Role the unit on its back and remove the screws that hold the front bezel in place (very small screws so don't loose them).
-
Unscrew the gray metal cover that covers the Display board. It has two larger screws on it.
-
Carefully pull the display out for work. Your unit should look like the mess (below).
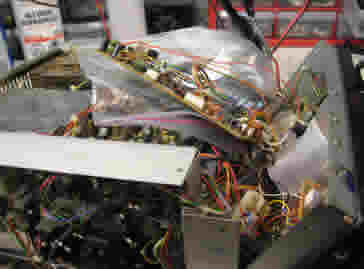
The plastic bag is used to insulate the board from the stuff below so that it can be powered up for testing
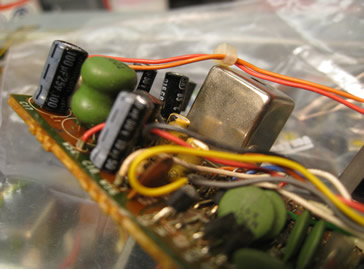
Replace the caps on the left side of the board in order
C17 - 100 uf 16V
C18 - 10 uf 25V
C19 - 10 uf 25V - Watch out this one 'looks' like its reverse polarity (its not)
C20 - 10 uF 25V
C21 - 4.7 uf 60V
C22 - 3.3 uf 60V
C23 - 3.3 uf 60V
I replaced them one at a time and tested between installs. When it starts working I stop. I do this to lessen the stress on these old and fragile components. My receiver turned out to have C19 installed backwards with the negative side going to ground. This is in a negative 30 V power supply so the positive side has to be grounded.
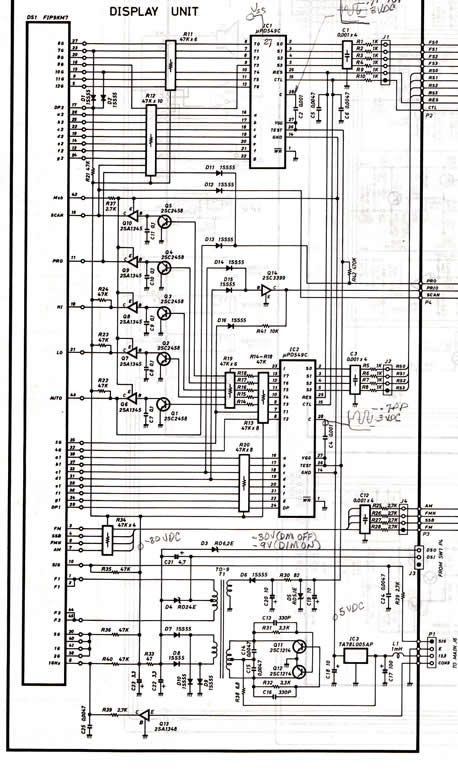
Schematic for the Display board.
While I had the receiver open I checked the jumpers that are used for the serial port control. This is how you get at them.
Remove the top and the plate that you find with the small power supply on it (four screws).
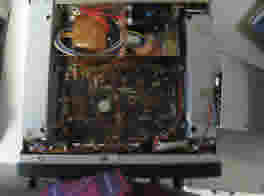
In about the middle of the board you will find a row of Berg jumpers. Set them up like the thumbnail below.
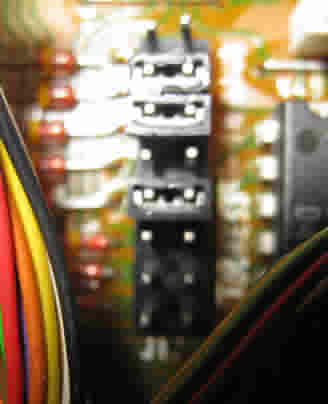
This sets up 9600 baud, No parity, 8 data bits, 1 stop bit and sets the receiver to number 8 (this is if you have a standard ICOM CAT setup and need to run several receivers).
242 - State Machine 2011-12-20
This is the simple state machine behind the Control Panel Start push button. I needed it to keep the database operation sorted out.
241 - Decoding Master/Detail Tables 2011-12-19
I am trying to make three tables work in a master/detail relationship - its confusing. Here are the table layouts for a two table M/S example.
This is from the MyDACdemo project and works great for a two table Master/Detail. The trick is the SQL you put into the detail query (quDetail). It must be:
SELECT * FROM EMP WHERE DEPTINO = :DEPTNO
for each detail query and the colon is very important. I can now use these concepts to build a triple of Scans to Chunks to Hits. Hooking up the components is confusing but does work.
240 - Target Table 2011-12-18
I'm having a huge problem creating a suitable Target table. It turns out the correlation between star name and star location (in Az and El) is not that straight forward. I have decided to check all my entries against SIMBAD (at Harvard) by submitting a list of object identifiers using the Bayter reference. Some entries don't make sense, some are missing altogether, most are usable. Still working on this one.
Breakthrough - Got it fixed and looking good. The target table now consists of 325 named stars all with RA and DEC in decimal.
239 - Database Functions 2011-12-11 (This description defiantly is a work in progress)
I have made a lot of progress on the SETI database during this month and its over all importance to the system is becoming more apparent. I have decided to change the structure ofthe system based on a better understanding of what I am attempting to accomplish.
The SETI Net data base will be organized around the following objects (the latest version of this table is in the Database
- Search - The collection of all Scans. The complete Search is held in the database SETI. There is one Search only.
- Scan - The Search is made up of an unlimited number of Scans. Each Scan has a Target which is the Star or other object from the list of objects available to SETI Net. The Target is held constant through out each Search. A single Scan will start at the earliest Chunk Data/Time and end with the latest Chunk Data/Time
- Chunk - Each Scan is made up of Chunks. Each chunk contains a Start Date/Time and an End Date/Time. The frequency increases due to bin shift and frequency jumps. There can be an unlimited number of Chunks in each Scan.
- Hit - If a signal is detected during a Chunk a Hit is created. The recording system comes on and the jpg and WAV files are saved. This halts a Chunk until the hit can be falsified. Each Hit is defined by the data it contains. This, in turn, is defined in the Hit file maintained and available
- Point - A single search address consisting of DEC, Ra, Frequency and Date/Time and all the other data that is contained in SML.
- SML - SETI Markup Language (SML) is defined in the database section. It contains a complete description of each Point in the database.
This picture shows three Scans. From Left to right the first one is pointed at Sag A (DEC -30, Ra 19) it appears to be 1/3 the way complete. The possible range of frequencies is from 1375 MHz to 1450 MHz (75 MHz) so it has completed from 1375 to 1400 MHz. The number of Hits along the path of this scan will be displayed on a table when the user mouse's over the scan. The second red line shows a completed scan to Cygnus, the third a partial to Gemini.
The width of the scan line is the half power beam with of the antenna.
There are many problems with this notation.
-
The length of the Scan line indicates the progress from 1375 to 1450 but the absolute length of the line depends on the targets DEC and Ra
-
The point of origin has to be somewhere, and I chose Ra 0, DEC -90 but that implies that SETI net is at that location - it is not
-
There can be 5,000 chunks between 1375 and 1450 based on 20 KHz/chunk but a typical run can take several hours and only cover 5-10 chunks. That would make the Scan line very discontinuous and actually hard to see at all
-
A fully populated Scan line system would blot out the entire Sky Map
-
Because of the Mercator projection the line width would vary from very fat at the bottom to skinny at DEC 0 and then back to very fat. This would look strange indeed.
-
The only information transmitted by this chart is target and frequency progress. A lot of work to convey that alone.
Idea 2
Some sort of graphical display of chunks where Scan ID is the X axis and the Y axis is frequency
Idea n
238 TO DO for the new year 2011-12-03
- This is a collection point for all the things I want to change on the system
- Database - Add table access to the run time system and think about the web site access to this data
- Search Strategy - Make sure that the stare function works as expected. It must shut off, continue, advance frequency, DEC, and Ra on button push
- Waterfall - There must be a way to make the dynamic range of the color system match the range
