Tools In Use
This is a collection of tools used in the day to day operation of the Cosmic Ray project
Pixel Birthday
| Down Load | Source Code |
(on request) |
The Pixel Birthday program works at the end of the pixel production line in the manufacturing facility. It manages the identification of each pixel as it is completed and readied for shipping.
Pixel Birthday performs two tasks. It writes the pixel identification information into the project database and it also writes a special file to a small SD card. The SD card is then installed into the pixel and contains the information necessary for the it to transmit its event data correctly.
Please note: When you download Pixel Birthday install it with all the default conditions. That works best.
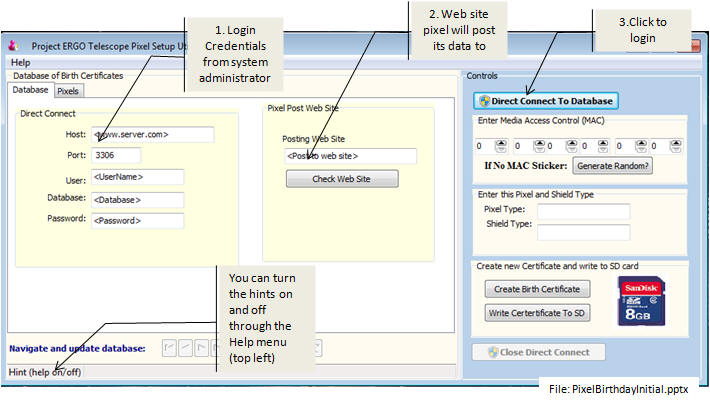
Happy Birthday Pixel Initial Screen
Direct Connect - Enter your credentials for direct access to the ERGO database. Get your assigned user name and password from the local system administrator:
- Host The Host: will be the name of the database server. It will be something like: biz123.setimotion.com
- Port is almost always 3306 but can be changed here
- User-name - Supplied by your data administrator
- Database - The name of the database on the server (example: setine5_ergo)
- Password - Supplied to you by the data administrator
Posting Web Site - This web site is the one that shows the collected data to the public. Make sure its up and running with this check or you will not be able to connect.
Log In - When you have it all set up click the 'Direct Connect to Database' button on the right side
Please note: Once you have successfully logged in Pixel Birthday remembers your credentials and will jump you straight to the database without re-entering this screen of data.
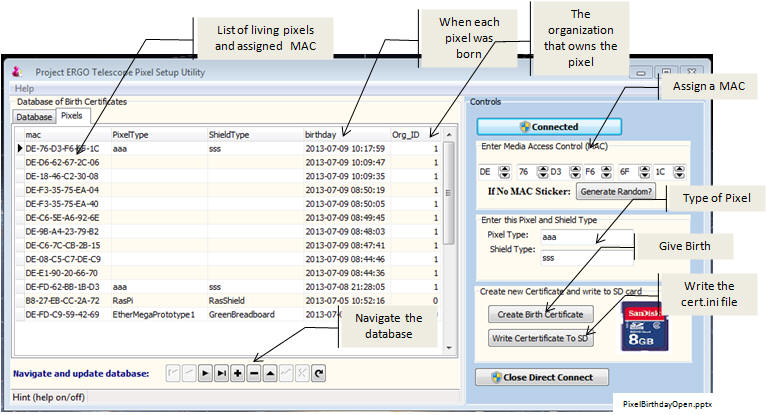
Happy Birthday Pixel - Running
When you have managed to log into the database you will see this screen. The left side shows birth certificates already issued. The right side needs to be filled out for this new pixel.
MAC - The Media Access Controller. This number is assigned to every pixel and *must* be unique. Its how messages find there way to the pixel from the server as it fills the database. The first three sets of digits identify the pixel are hardwired in
Enter Pixel and Shield Type - This allows the server to manage the data depending on what type of pixel generated it. The types are preassigned and can be selected from the down arrow. When you are happy with the input move to Create new Certificate.
Create Birth Certificate - Pressing this button writes the new Birth Certificate into the database where it can be reviewed or deleted if necessary. The left side of the display will now have the new pixel information.
Notice that the time is in an ISO format the proceeds from biggest (the year) down to the smallest (milliseconds). This format makes wondering if 02/03/10 is the second month (February) third day or second day of March a thing of the past. This Big-to-Little ISO format is used throughout the ERGO system.
The Org_ID fieldThis is the identifier of the organization the has the physical pixel. Initially this field will be 1 for ERGO Telescope WIP store.
Write Certificate to SD - This button writes a file to your computer titled 'cert.ini'. this can be anywhere on your computers hard drive or directly to a SD Card for installation in the new pixel itself.
Navigation of the database - You can move through the database with the Navigation tool at the bottom of the left screen. Hover the mouse over each button to understand its role.
ERGO ublox monitor
| Down Load | Source Code |
(on request) |
The ERGO ublox monitor is a tool used to display the output of a ublox GPS module in various formats (ASCII , Decimal, Hex, and NMEA)
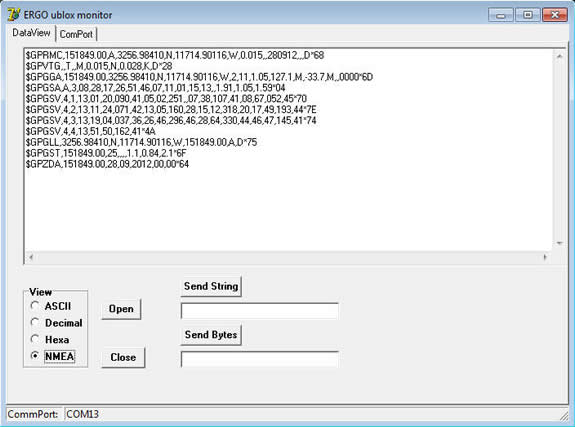
ERGO Monitor showing NMEA format
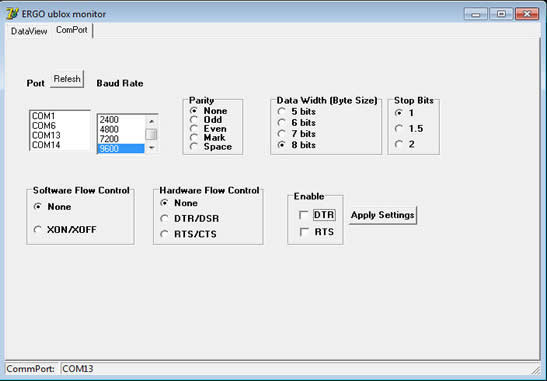
ERGO Monitor Comport Setup
HMAC-Sha256 Generator
| Down Load | Source Code |
(on request) |
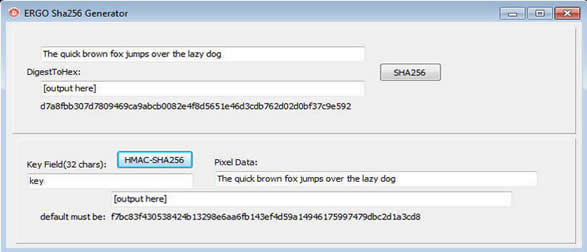
This is a crypto test tool used to verify the creation of 256 bit Secure Hash Algorithms (Sha 256) and Hash-based Message Authentication Code (HMAC 256).
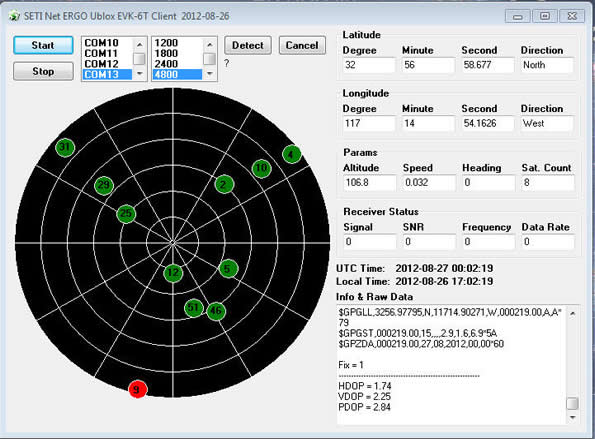
GPS Client
| Down Load | Source Code |
(on request) |
